Friday, April 30, 2010

Flashback Friday: Grilled Tequila Chicken...

Flashing back to a recipe I made a year ago. It was another gorgeous day and we love grilling, especially when it's nice outside. Reminded me just how much we loved this grilled chicken recipe. The Griller is a good sport, he should have a been a mailman... rain, sleet, snow or shine! I love revisiting, this one was really a great recipe, and just as good good cold then day. I won't mention I had it for breakfast, standing in front of the frig!

The original post is here...
Tequila-glazed Chicken with Jalapeño


Tequila-Glazed Chicken with Jalapeño 
Source: Bon Appétit, August 2007 - Molly Stevens
Printable Recipe

1 1/2 tablespoons whole coriander seeds, coarsely ground in spice mill or mortar with pestle
1 3/4 teaspoons coarse kosher salt
1/2 teaspoon dried crushed red pepper
1 (3 1/2- to 4-pound) cut-up (best of fryer) chicken
1/3 cup orange juice or pineapple juice
1/4 cup gold or silver tequila
2 tablespoons (packed) golden brown sugar
2 tablespoons honey
1 to 2 red jalapeño chiles with seeds, finely chopped
1 shallot, minced
Nonstick vegetable oil spray

Mix coriander, salt, and red pepper. Sprinkle mixture all over chicken. Arrange chicken, skin side up, on baking sheet; cover and chill at least 6 hours or overnight.

Combine orange juice, tequila, brown sugar, honey, 1 jalapeño, and shallot in small saucepan. Bring to boil, stirring until sugar dissolves. Reduce heat to medium-low; simmer until mixture thickens slightly, about 10 minutes. Add 1 more jalapeño if more heat is desired. Cool glaze. Transfer 3 tablespoons glaze to small bowl and set aside for serving.

Spray grill with nonstick spray. Prepare barbecue (medium heat). Arrange chicken, skin side up, on grill. Grill 15 minutes, turning occasionally. Brush chicken with glaze in saucepan. Turn chicken over; brush with glaze. Grill until juices run clear when pierced with fork or until instant-read thermometer inserted into chicken registers 170°F, turning and brushing occasionally with glaze, about 10 minutes longer. Transfer to platter. Spoon reserved glaze over.

  ~~~~~~~~~~~~~~~~~~~~~~~~~


Check out more flashbacks over at Kitchen Bouquet with Suzy! On Fridays Suzy digs into her photo archives to blog about something from the past. Maybe you have some oldies but goodies you want to share too. Grab the logo and link back to Suzy when you have time to do a Flashback Friday post.

Thursday, April 29, 2010

Grilled Fish Taco's!

Not sure what's happening to us, but we're eating a lot more fish lately. and enjoying it, too! That's the surprise of it, I can get them to eat it, healthy and all, but getting them to like it and ask for it, another story. Well, that one kid, she'll have no part of it, will never eat it. She has her likes and won't deviate. Maybe the seven year rule will apply. Someone once said in a cooking forum, to try things you don't like every seven years, your tastes may change. Seemed to have worked with the fish, but no way will I ever like asparagus. Hasn't happened yet. The picky one, she loves it. Go figure.

Made Turkey Taco's for Miss Picky, used the same spices that I do for beef and just subbed ground Turkey! We had the Grilled Fish Taco's. I've made them before using a similar recipe. Loved that one and I forgot all about it and ended up finding a new one, also at epicurious. but I like tweaking and searching for new recipes, so it worked out fine. Everyone was happy!


I poured the marinade in a Ziploc bag to marinate the fish, less dishes to wash. and because we don't like the smell of cooking fish in the house, the Griller put it in a foil disposable pan and cooked it outside on the grill. I served it in one piece instead of flaked. I also mixed the Crema in with shredded cabbage and served that inside the taco, along with fresh tomato salsa and the pickled onions.We had whole wheat tortilla's, instead of corn or flour.

Can't be all that healthy, we had Italian cream ice for dessert!


Fish Tacos
Source: adapted from Epicurious, May 2009 – recipe by Lourdes Castro, Simply Mexican
Printable Recipe

1/2 red onion, thinly sliced
About 1 1/2 cups red wine vinegar (I used 1/2 cup rice wine vinegar, a little less than 1/4 cup simple syrup and some water)
1/4 cup olive oil
1 1/2 teaspoons ancho chile powder
1 1/2 teaspoons dried oregano (I used Mexican oregano)
1/2 teaspoon ground cumin
1/4 cup lightly packed fresh cilantro leaves, chopped, plus more for garnish
1 jalapeño, stemmed and chopped
1 pound flaky white fish (such as mahi mahi or cod), cut into 4 pieces
salt and pepper
8 fresh corn tortillas (I used whole wheat)
Mexican crema, homemade or store-bought (I mixed 1 cup sour cream with the zest and juice of one lime, jalapeno, a little salt and pepper)
Fresh Tomato Salsa
2 limes, cut into quarters

Put the onion in a small bowl and pour in the vinegar to cover well. Set aside for at least 30 minutes or up to several weeks.

Pour the olive oil into a small bowl and add the ancho chile powder, oregano, cumin, chopped cilantro, salt, pepper and jalapeño. Mix well. Place the fish on a dish and pour the marinade over it, making sure to coat the fish well on both sides. Allow to marinate for 20 minutes. (I put it in a Ziploc bag to marinate)

Heat a nonstick sauté pan over medium-high heat. Place the fish in the pan, no need for more oil. Cook the fish for about 4 minutes, then turn over, and cook for another 2 minutes. Remove the pan from the heat and flake the fish into the pan with a fork, making sure to mix in all the marinade that has stuck to the bottom of the pan. Check if it needs more salt and pepper. I cooked it on the grill, in a disposable aluminum pan and left the pieces whole!

Place four of the tortillas on a plate and sandwich them between two slightly dampened sheets of paper towel. Microwave on high for about 45 seconds. Place the warm tortillas in a towel-lined basket or plate and cover. Repeat with the remaining tortillas.

To assemble the tacos, place a big spoonful of the fish onto the center of a tortilla. Top with the marinated onions. I also added a sort of cole slaw to the taco's. Serve with salsa.

Fish Taco Cole Slaw
1 bag shredded green cabbage
1 cup sour cream
juice and zest of one lime
minced fresh jalapeno (half of one jalapeno)
salt and pepper to taste

Combine the sour cream with the lime juice, zest, jalapeno, salt and pepper. Mix shredded green cabbage in with the crema and refrigerate for about 20 minutes.

Sunday, April 25, 2010

Mosaic Monday: Log Cabin? Are you kidding?


To me it's not really Spring until I get that first scent of lilacs! It's spring here for sure!


It was a beautiful Saturday here on Long Island yesterday, and today we have one of those rainy all day kind of days! So what better to way to end the weekend than with a nice big brunch! Yesterday was a beautiful day for lilacs and gardens. Today is a lazy Sunday, so we were in no rush, we all sat down to a really nice, very late breakfast! Shortcuts involved for sure, but still it was brunch, and it was good. and I found something out about the Griller today!

WHAT DO YOU MEAN YOU PREFER LOG CABIN SYRUP????????????
ARE YOU KIDDING?

He came clean after all these years! Can't believe it. I mean we do eat our share of junk food and sweets. I like pre-prepared foods as much as the next guy. Ravioli in a can. Fine. Love it. Mac-n-cheese from a box, the best! Even mashed potatoes that are powdered. Not a problem here. But sugary sweet, no "maple" flavor pancake syrup versus REAL GRADE B Maple syrup? I like both but prefer Grade B syrup. He never expressed a preference. Go know? What a surprise that was! Next he's going to tell me he prefers his mother's brisket over mine?


By the way, those pancakes? From a container. Shake and Pour. They're ok. Better than the canned pancakes! but definitely not as good as the box. Remember that canned stuff? We like the box mix so much better. Much, much better!  We like scratch but sometimes it's ok by me to just grab the mix! No mess, no fuss. I'm all for convenience! and kitchen gadgets!


See what I got from Williams-Sonoma? A pancake pen. If you make lots of pancakes, this is a great kitchen toy! No drips like with a spoon or a ladle! I really liked this thing!


Basic Pancakes
Source: Martha Stewart Everyday Food
Printable Recipe

1 egg
1 cup all-purpose flour
3/4 -1 cup milk (more or less to desired consistency)
2 tablespoons unsalted butter (melted) or vegetable oil
1 tablespoon sugar
2 teaspoons baking powder
1/2 teaspoon salt
vegetable oil for the pan

Preheat the oven to 200 degrees F.

Mix your dry ingredients together, then add in your wet ingredients. Mix until it's all moistened, a few lumps are ok. Don't over mix.

Pour about a tablespoon of vegetable oil on a paper towel and wipe the inside of a large skillet or skillet with the oil, giving it a thin coating. Heat the large skillet or griddle on medium heat. Spoon about three tablespoons or so of batter into the skillet, you should be able to get about three pancakes in the pan, depending on size of the pan and size of the pancakes! When it’s bubbled up on one side, flip them over and cook the other side for another minute or two until that side has browned!

Transfer to a baking sheet; cover loosely with aluminum foil, and keep warm in oven. Continue with more oil and remaining batter. Serve warm, with whatever toppings you prefer.


Joining Mary from The Little Red House for another Mosaic Monday! Stop by the Little Red House to see lots of fantastic Mosaics every week!

Saturday, April 24, 2010

Lightening up General Tso!

Cooking up a storm lately! The spring weather must be giving me some extra energy or something. Tomorrow it's back to ordering in, it's been enough of a streak for now! I think stir fry is one of the easiest meals to make for dinner. So I tried looking for something new. We always have Chicken with Cashews. So I went looking for something a little different. Found this one at Martha Stewart. It was very good. but next time I'd use a lot less sugar! and maybe a little less pepper, almost took out Grandma, LOL!


Lighter General Tso's Chicken
Source: Everyday Food – October, 2008
Printable Recipe
(adapted)

1 1/4 cups long-grain brown rice
1/4 cup cornstarch
1 pound snow peas, trimmed and halved crosswise
4 garlic cloves, sliced (I used 3 minced cloves)
2 teaspoons fresh ginger, grated and peeled
3 tablespoons light-brown sugar (next time I'd cut it to 1or 2 T)
2 tablespoons soy sauce
1/2 teaspoon red-pepper flakes
2 large egg whites
Coarse salt and ground pepper
1 pound boneless, skinless chicken breasts, cut into 1-inch pieces
2 tablespoons vegetable oil

Cook rice according to package instructions. In a bowl, stir together 1 tablespoon cornstarch and 1/2 cup cold water until smooth. Add snow peas, garlic, ginger, sugar, soy sauce, and red-pepper flakes; toss to combine, and set aside.

In another bowl, whisk together egg whites, 3 tablespoons cornstarch, 1/2 teaspoon salt, and 1/4 teaspoon pepper. Add chicken, and toss to coat.

In a large nonstick skillet, heat 1 tablespoon oil over medium-high. Lift half the chicken from egg-white mixture (shaking off excess), and add to skillet. Cook, turning occasionally, until golden, 6 to 8 minutes. Transfer to a plate; repeat with remaining oil and chicken, and add the rest of the cooked chicken and any juices, along with the snow-pea mixture to skillet. Toss to coat. Cook until snow peas are tender and sauce has thickened, 3 to 5 minutes. Serve with rice.

Thursday, April 22, 2010

Flashback Friday: Pizza!

Flashback to the past on Fridays with Suzy at Kitchen Bouquet! Food, flowers, fun, anything goes on Flashback Friday!

Today I'm flashing back to a flashback of a flashback? Not sure if I'm even following myself with this one, but I'm flashing back to pizza. We cheat  these days and just pick up the dough at the pizza place. but I have made the dough and it's not that difficult. Even for me, the one with the least amount of baking skills, not to mention yeast challenged! I think I am a serial yeast killer. Unless it's really the yeast, but I doubt it. So I happily end up at the pizza place picking up the dough, and a zeppole or two or three, as long as I am there! but if you must there is a really easy and really good pizza dough recipes on those flashback links! or if you can just click...HERE!

We made these again the other day! Supposed to be calzones, but miss Picky doesn't like all that globby cheese, so the calzones turned into a quick pizza and off they go with their friends. Fast dinner with a salad!


Whenever we make pizza, the favorite always seems to be the White Pizza with Mushrooms and Onions! and when we do eat pizza, it's got to be on the white paper plates! Just because.


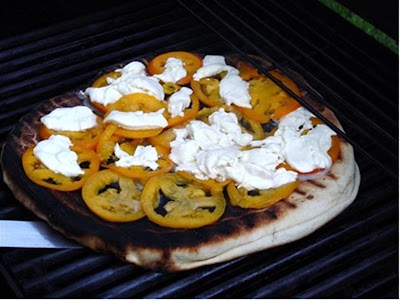
and next time, something we really have to try again, is Grilled Pizza. Amazing flavor on the crust! Came out fantastic. Well, it did after we screwed up the first one! Really great flavor and I think we are due to grill it again next time. Just be careful about burning, PAY ATTENTION! We learned that pretty quickly the first time... 
 there is no smoke alarm that comes with a grill

notice the burned parts? and the undercooked cheese? Raw tomatoes?


We got the hang of it on the second pie, that one was excellent...

and what else, a WHITE PIZZA!!

Directions to Grilled Pizza
Printable Recipe

Brush grill surface clean. Most important are clean grates and oiling them!
Spray grill grate with non-stick cooking spray (we wiped with oil on a paper towel!)

Preheat grill to medium.
While the grill is preheating, using a lightly oiled surface, work dough into pizza pie shape, but not bigger than grill size.

Press dough, working from the middle towards the outer edges Brush 1 tablespoon of olive oil on the dough.
Turn the dough over and brush 1 tablespoon of olive oil on this side of the dough.

Transfer dough from work surface to cookie sheet.
Transfer dough from cookie sheet to grill (Note: Unless you are extremely coordinated, this requires two people; one to hold the cookie sheet, and one to transfer the dough.)
Close grill cover.

Check dough every few minutes until bottom is browned and top is bubbly - about 5 to 10 minutes
Transfer dough from grill using cookie sheet.
Turn dough grilled side up.
Add sauce, cheese, and toppings to grilled side.
Return to grill and slide dough off cookie sheet onto the grill with the uncooked side down (Note: Once again, this is easiest with two people; one to hold the cookie sheet, and one to transfer the dough.)
Close grill cover.

Check dough every few minutes until bottom is browned and cheese is melted - about 5 to 10 minutes (the bottom might brown faster than the cheese melts)
Transfer grilled pizza to cookie sheet, slice & serve.
notes -  some toppings you may want to par-cook before you grill because the crust cooks pretty quickly.


Wednesday, April 21, 2010

Kebabs! Satés! Dinner on a Stick!

My friend, Woodie, went and did it. She had mentioned chicken wings made with Mikey's Jerk Marinade (a family recipe!) a few months ago and I couldn't wait to try it. They were a big hit here during the Superbowl.

and now Woodie was talking about visiting her relatives again and having Mike's marinade sloshed all over some chicken kebabs. Now that got me craving all over again! Only I wanted beef, not chicken for what seems like the 112th time this month. So the Griller did me a favor and ran to the butcher to pick up some sirloin and a skirt steak for Miss Picky! A skirt steak kebab will work for her. and all those grilled vegetables. Served on a bed of rice from the local Middle Eastern/Israeli grocery here in town. They called it Mejedra. Rice, lentils and onions. Lots of flavor. I've googled it.  Tons of spellings,  and recipes. I think I could make it myself. But they make it so good, why bother? So I didn't.


Here's the link to the marinade with the wings...   Mikey's Jamaican Jerk Wings!
Here's the link to the Tuna Satay... Tuna Satés with Wasabi Mayo!


Jamaican Jerk Vegetable and Beef Kebabs, Tuna Satés ready for the grill!
Soak the bamboo skewers in water for an hour, use two skewers for each kebab to prevent the food from rolling around or falling off! We didn't lose a piece to the grill, we did lost a piece or two to the Griller! He's had dibs on first taste!


Grilled and ready to plate!


Tuna Satés with Wasabi Mayo
posted by Ilisa at The Ramen Chronicles blog
Printable Recipe

You can cut this recipe in half for a smaller group.

1 1/2 cup mayonnaise
1/2 cup sour cream
1/4 cup soy sauce
1 1/2 tablespoons sugar
juice of one lemon
5 tablespoons wasabi paste, or to taste
4 12-ounce tuna steaks, cut into 1-inch cubes

Stir all ingredients together. Put tuna cubes in a bowl and cover with 1 cup (or more, if needed) of the wasabi mixture. Marinate in the refrigerator overnight. Put remaining wasabi mixture in a bowl for dipping and refrigerate overnight.

Either sear tuna in a very hot pan with olive oil, just a minute each side, or stick it on a prepared skewer and grill over very hot coals for a few minutes each side. Serve tuna satés with chilled wasabi mayo for dipping.


Mikey's Jamaican Jerk Marinade
Source: AnnieWoodie
Printable Recipe

4 Scotch Bonnet chilies (or any hot pepper, amount depending upon your taste - we use much less than called for!)
1 bunch scallions (both white & green parts, trimmed and coarsely chopped
2 shallots - halved
1 small onion - quartered
2 cloves of peeled garlic
1 tablespoon grated fresh ginger
2 teaspoons chopped thyme or 1 teaspoon dried
2 teaspoons ground allspice
3 tablespoons canola oil
3 tablespoons soy sauce
3 tablespoons lime juice
2 tablespoons packed brown sugar
2 tablespoons salt
1 teaspoon ground black pepper
1 cup of water

This is enough to marinate 4 pounds of meat

Combine chiles, scallions, shallots, onion, garlic, ginger, thyme, allspice, oil, soy, lime juice, sugar, salt, pepper, and water. Blend in a blender until smooth. Marinate from a few hours to several days and grill until done.

Tuesday, April 20, 2010

Penna alla Vodka

This was really good. Really fattening. But really good. and that's all I have to say today :)


Penne alla Vodka
Source: Lidia's Italian-American Kitchen by Lidia Bastianich
Printable Recipe

salt
One 35-ounce can Italian plum tomatoes (preferably San Marzano) with their liquid
1 pound penne
1/4 cup extra-virgin olive oil
10 cloves garlic, peeled (I use a lot less, maybe 2-3)
crushed hot red pepper (to taste) (I used about 2 pinches)
1/4 cup vodka
1/2 cup heavy cream (I use less, a bout 1/3)
2 tablespoons butter or olive oil for finishing the sauce (optional)
2 to 3 tablespoons chopped fresh Italian parsley
3/4 cup freshly grated Parmigiano-Reggiano

Bring 6 quarts of salted water to a boil in an 8-quart pot over high heat.

Pour the tomatoes and their liquid into the work bowl of a food processor. Using quick on/off pulses, process the tomatoes just until they are finely chopped. (Longer processing will aerate the tomatoes, turning them pink.)

Stir the penne into the boiling water. Bring the water back to a boil, stirring frequently. Cook the pasta, semi-covered, stirring occasionally, until done, 8 to 10 minutes.

Meanwhile, heat the olive oil in a large skillet over medium heat. Whack the garlic cloves with the side of a knife and add them to the hot oil. Cook, shaking the skillet, until the garlic is lightly browned, about 3 minutes. Lower the work bowl with the tomatoes close to the skillet and carefully (they'll splatter) slide the tomatoes into the pan. Bring to a boil, season with salt and with crushed red pepper to taste (you can always add more it needed!) and boil about 2 minutes. Pour in the vodka, lower the heat so the sauce is at a lively simmer, and simmer until the pasta is ready.

Just before the pasta is done, take the garlic cloves out of the sauce and pour in the cream. Add the 2 tablespoons butter or oil, if using, and carefully swirl the skillet to incorporate into the sauce. If the skillet is large enough to accommodate the sauce and pasta, take the pasta out of the boiling water with a large wire skimmer or a small strainer and drop it carefully into the sauce in the skillet. If not, drain the pasta, return it to the pot, and pour in the sauce. Bring the sauce and pasta to a boil, stirring to coat the pasta with sauce. Check the seasoning, adding salt and red pepper if necessary. Sprinkle the parsley over the pasta and boil until the sauce is reduced enough to cling to the pasta.

Remove the pot from the heat, sprinkle the cheese over the pasta, and toss to mix. Serve immediately, serve with additional cheese if you like.

My note - Sometimes I add a little pancetta or prosciutto, about 1/4 lb. sliced thin and cut into 1/2-inch pieces, to the sauce. Saute it with the garlic.
Back to top