Showing posts with label Flashback. Show all posts

Friday, November 4, 2011

Chicken Piccata

One of our all-time favorites is Chicken Piccata. I make it often, usually when I can't think of what else to make. My Miss Picky loves it and even made it herself a few years back for a class assignment. You can read about that here on this post. That was the beginning of High School, now she's applying to colleges. That went fast. But she still loves that Piccata, even when it isn't for a grade. On the side was zucchini spaghetti!  Julienne zucchini with sauce and Parmesan and garlic. Lots of garlic.


Woodie's World Famous Chicken Piccata
posted by Woodie many times at the Cooking Forum
Printable Recipe

4 chicken breast halves, boned and skinned (I cheat and buy the thin sliced chicken cutlets!)
salt and pepper
flour (enough for coating)
3 tablespoons butter
juice of 1 lemon
1-1/2 cups chicken broth
1/2 cup white wine

Put a piece of waxed paper on the counter and place chicken on top. Use a meat pounder, the side of a saucer, the unsharpened side of a heavy knife or other object to pound the breast into a thin piece that’s uniformly thick (about an inch). Salt and pepper the chicken generously, then coat with flour. Melt butter in a large skillet and brown chicken on both sides.

Remove chicken from skillet. Add lemon juice, chicken broth and wine. Boil down until it’s about one-half cup. Place chicken back in skillet, cover and cook 3 minutes. Remove cover and serve.

Joining 
Beth at Beth Fish Reads for her fun Weekend Cooking Party. Every weekend. It's open to anyone who has any kind of food-related post to share! Go on over and see some fun posts.
 

 and


Friday, April 29, 2011

Coffee Cake!

Best coffee cake ever! I've made this one again and again and it's always a big hit. I got it from a teacher aide at my kids elementary school. The big kid is now graduating college soon, so that's how long I've had this recipe. The teacher aide brought it in to a class function and everyone begged for the recipe. I've been making it ever since. You won't even notice the coconut. But it adds to the moistness of the cake. My addition was the pecans. The original recipe didn't have them because there's no nuts allowed at school, except for the occasional parent. Myself included :)


Coffee Cake
Source: Mrs. Watson
Printable Recipe

TOPPING:
1 cup sugar
5 tablespoons chopped walnuts
2 tablespoons cinnamon
2 tablespoons sweetened shredded coconut

CAKE:
3 cups flour
2 teaspoons baking soda
1/4 teaspoon salt
1 cup butter (unsalted)
2 cups sugar
4 eggs, room temperature
2 cups sour cream
2 teaspoons vanilla

FOR TOPPING: Combine all ingredients and set aside.

FOR CAKE: Preheat oven to 350 degrees. Butter 9 X 13" pan. Sift flour, baking soda and salt into medium bowl. Cream butter with sugar in large bowl until light and fluffy. Beat in eggs one at a time. Beat in sour cream and vanilla. Mix in dry ingredients until just blended. Spoon into prepared pan. Sprinkle with topping. Swirl knife through topping and batter. Bake until tester comes out clean, 45-50
minutes.

~~~~~~~~~~~~~~~~~~~~~~~~~~~~~~~~~~~~~~~~~

Joining the fun at


And more fun and recipes at Sweet as Sugar Cookies for Sweets for a Saturday!


Joining Beth at Beth Fish Reads for her fun Weekend Cooking Party. Every weekend. It's open to anyone who has any kind of food-related post to share! Go on over and see some fun posts.

Friday, April 22, 2011

Madeleines

Ha! I can bake sometimes without burning the potholders OR the cookies. This proves it. And I have made these Madeleine's many times. And they really are fool-proof.  I thought I had posted about them before but I couldn't find them here. They still qualify as a flashback because I have made them before. If you want an impressive little treat, try them, they are very easy, like little sponge cakes. They're very good dipped in chocolate or with a glaze. But they are out of this world good just plain, enjoyed with a nice cup of tea. If you like tea.  I'd rather have coffee but that's another story.


Madeleines
Source: Bon Appetit, January 2000
Adapted by There's Always Thyme to Cook
Printable Recipe

2 large eggs
2/3 cup sugar
1 teaspoon vanilla extract
1/2 teaspoon grated lemon peel
pinch salt
1 cup all-purpose flour
10 tablespoons (1 1/4 sticks) unsalted butter, melted, cooled slightly
powdered sugar, for dusting

Preheat oven to 375°F. Generously butter and flour pan for large madeleines. Using an electric mixer, beat eggs and sugar in large bowl just to blend. Beat in vanilla, lemon peel and salt. Add flour; beat just until blended. Gradually add cooled melted butter in steady stream, beating just until blended. Do not overbeat.

Spoon 1 tablespoon of batter into each indentation in pan. Bake until puffed and brown, about 15 minutes. Cool 5 minutes. Gently remove from pan. Repeat process, buttering and flouring pan before each batch.

Dust cookies with powdered sugar or you can dip them in melted chocolate or drizzle lemon glaze on top.

For Lemon Glaze: mix enough powdered sugar with 2 tablespoons of fresh lemon juice to get the consistency you like

~~~~~~~~~~~~~~~~~~~~~~~~~~~~~~~~~~~~~~~~~

Joining Beth at Beth Fish Reads for her fun Weekend Cooking Party. Every weekend. It's open to anyone who has any kind of food-related post to share! Go on over and see some fun posts.


And more fun and recipes at Sweet as Sugar Cookies for Sweets for a Saturday!


and joining Sweet Tooth Friday hosted by Alli n Son!

Friday, April 1, 2011

April Fool's Flashback!

Joining Suzy from Kitchen Bouquet for another Flashback Friday!  
This time for April Fool's Day, I'm flashing back to Fushi! 

FAKE + SUSHI = FUSHI!

My original post is here.

I must have made thousands of those treats over the years because for a long time I was a baking counselor in a day camp! So one year we decided to change it up a bit and make Fake Sushi, we called it Fushi. It's fun to make, fun to eat and it's really easy. Not to mention sticky. All you need is marshmallows, butter, Rice Krispies cereal, green fruit rollups or any color really, and some Twizzlers pull-n-peel candy, gummy worms, you can get as creative as you like. It's a fun, gooey mess, but the kids love it! And so did one or two adults :)


Fushi
Source:  FamilyFun Magazine
adapted by There's Always Thyme to Cook

Printable Recipe

Makes 4 to 5 dozen

1/4 cup butter
4 cups mini marshmallows
6 cups crisped rice cereal
20 to 25 gummy worms (or Twizzler's Pull-n-Peel)
1 to 2 boxes fruit leather

Grease a 12- by 17-inch baking sheet. Melt butter in a 2-quart saucepan over medium heat. Add the marshmallows and stir until smooth.

Remove the mixture from the heat and stir in the rice cereal until it's evenly coated. Turn the baking sheet so that the shorter ends are at the top and bottom. Then press the marshmallow mixture onto the sheet, distributing it evenly.

Starting at one side an inch up from the lower edge, place gummy worms atop the mixture end to end in a horizontal line. Gently roll the lower edge of the marshmallow mixture over the gummy worms.

Then stop and cut the log away from the rest of the mixture. Use the same method to form 4 more logs. Slice each log into 1-inch-thick "sushi" rolls and wrap them individually with a strip of fruit leather. Garnish with julienne slices of dried apricots!


Thursday, March 17, 2011

Chicken Scarpariello

Chicken Scarpariello has to be one our favorite chicken dishes of all time! Well, maybe next to Rao's Lemon Chicken and Chicken Piccata. But it's way up there, really high on the list! My original post on Chicken Scarpariello is here!  It's the recipe I've used for years, and we love it. But this recipe from Rao's sounded so good, I decided to try it instead of my old standby, which is very similar. I left out the jalapeno's!  We loved it. In the old recipe I used lemon juice, this one had red wine vinegar! Nice change.


Rao's Chicken Scarpariello
Source: original recipe from Rao's Cookbook, original adaption at NY Times recipes
adapted There's Always Thyme to Cook

olive oil for pan
2 2 1/2-pound chickens, rinsed, patted dry, spines removed, each cut into 12 pieces (note - I also removed the skin!)
4 links Italian sausage (sweet, hot or both), in the casings, cut into 1-inch pieces
2 large bell peppers (red, yellow or green), seeded and cut into thin strips
1 large sweet onion, cut in half lengthwise and sliced
1 teaspoon minced garlic
6 hot vinegared cherry peppers, left whole  (I used sliced and poured in a little juice)
2 to 3 small potatoes, peeled, boiled and sliced (optional)
1/2 cup chicken broth
1/2 cup dry white wine
1/4 cup red wine vinegar
1 tablespoon dried oregano leaves
Salt and pepper to taste

Heat the oil in a large pan over medium-high heat. Sauté the sausage until brown. Remove from pan. In batches, brown the chicken on each side. Remove the chicken and drain on paper towels. In the same pan, sauté the bell peppers, onion and garlic until soft and beginning to brown, about 5 minutes. Remove from pan.

Carefully pour oil from pan. Return the sausage, chicken and vegetables to the pan. Add the cherry peppers, potatoes, chicken broth, wine, vinegar, oregano, salt and pepper. Cover and simmer until chicken is cooked through about 15 minutes. Uncover and continue cooking until the sauce has reduced slightly, about 10 minutes.

This tastes even better if prepared a day ahead. Prepare until the chicken has cooked through, don't reduce the sauce. Let cool and refrigerate. Next day, reheat, covered, until heated through. Uncover and continue simmering until sauce is reduced slightly.


Joining Suzy from Kitchen Bouquet for another Flashback Friday!

Friday, March 11, 2011

If you have the time...

try making your own Cherry Butter. It's so good. All you is need patience and about 4 hours! Well, we all know how much patience I have, but the good thing is you don't really have to do anything but stir every 30 minutes. Not a bad thing. You can get stuff done around the house. I did laundry. Big deal, there will be more tomorrow.

We love cherries, fresh, cooked, in a pie, in a preserve, in a BBQ sauce. So why not try making Cherry Butter. It's not easy to find around here at the store, Apple and Pumpkin seems to be easier to find.I had to be home all day so I figured, why not? I used frozen cherries. Not finding fresh here in the month of March, and no way was I pitting hundreds of them. I'm a bit lazy. Frozen works perfectly. I've used frozen before making Cherry jam. It's fine.

I tried finding a Cherry butter recipe online, not many out there to make, but tons to buy. So instead I found a couple of recipes to give me an idea of what to do, then found some Apple butter recipes to get some more ideas. I wasn't going to can it for long time storage. I'm just keeping it in the refrigerator, it'll be all gone before we even know it anyway!

Basically it's just a couple of ingredients and some spices if you like. All you need is time, time to stir and stir and stir. After about three or four hours at medium-low heat, it gets thick and spreadable. It's done. Be careful to stir at least every thirty minutes and keep the heat low. Your patience will be rewarded well. Cherry butter is a smooth and sweet treat. You taste the fruit, the cherry flavor really comes out when it's slowly cooked down. It's fantastic on toast, pancakes, crackers, or even drizzled on top of some ice cream. Try spreading it on a slice of toasted pound cake, or as a filling for cookies. Endless possibilities, all delicious.


It gets thick by reducing and reducing and reducing. Nothing in it but cherries, some sugar, use more or less what you like, and any spices you want, I used cinnamon and nutmeg. You can add allspice or cloves if you like, or nothing at all. A little squeeze of lemon juice brightens the flavor. And I found out from a friend that I can skip the stove top altogether and just put the whole concoction in the oven at 350°F and let it simmer away for a while. Stir it occasionally. No scorching, no burning. That's my kind of recipe. Definitely next time!

A while back I was in a canning phase, and made a few different types of jam. Cherry Jam was at the top of the list. It's so good. The Cherry Butter is a little different from the jam. They call it butter but there's no butter in it, it's just a spread.  A smooth, silky spread, and to me, a little easier than making jam. And next time it's going in the oven, I like taking the easy way out! And it beats getting splattered :)


Cherry Butter
recipe by Carol @  There's No Thyme to Cook
Printable Recipe
yield: more or less, about 2 pints

2 lbs cherries, fresh or frozen, pitted (I used 4 12-ounce bags of frozen dark, pitted cherries)
1 1/2 cups sugar
big squeeze of fresh lemon juice, about 1 tablespoon
1/2 teaspoon cinnamon
1/2 teaspoon nutmeg
1 vanilla bean, split

Put the cherries in a large dutch oven on medium-high heat and cook, covered for about an hour. Add the rest of the ingredients and stir, cover, but prop open the lid so the steam can escape. Bring back to a boil; reduce heat to medium, and stir the pot every 30 minutes. After another hour, pour the cherry mixture through a food mill and then return it to the pot. Heat on medium-low for a few more hours until the cherries have reduced and become very thick, stirring every 30 minutes or so. If it starts to stick, lower the heat a little more and keep stirring. Keep the lid on but not tight, so that the steam can escape. When it's reduced and very thick, take it off heat. Pour into sterilized jars and store in the refrigerator. Mine got very thick when it completely cooled in the frig. Don't overcook!

Note: You can also simmer it in the oven at 350°F for a few hours, stirring occasionally, remove when it gets really thick.


~~~~~~~~~~~~~~~~~~~~~~~~~~~~


Joining Suzy from Kitchen Bouquet for another Flashback Friday!


Joining Beth at Beth Fish Reads for her fun Weekend Cooking Party. Every weekend. It's open to anyone who has any kind of food-related post to share!


Joining in on the fun at Sweet as Sugar Cookies for Sweets for a Saturday!


Joining Mary at the Little Red House for Mosaic Monday. Stop by the Little Red House to see more mosaics!


and joining Debbie from Dining with Debbie for What's On the Menu Wednesday!

Friday, March 4, 2011

Nordstrom's Tomato-Basil Soup

Trying out another soup recipe, this time a Tomato-Basil soup! I usually make Tyler Florence's Roasted Tomato Soup, which we love, it's very easy, a little more time consuming with the roasted tomatoes. But then I came upon this recipe, from Serious Eats!  I've had the original at lunch in Nordstrom's Cafe. It's so good at Nordstrom's. And it's just as good at home. We loved it. It has heavy cream in it and canned tomatoes, instead of fresh, so it's easy just to make for a last minute addition to a meal, which was just what I did!  And I adapted it to what I had on hand. And it was another very quick and very easy recipe.


Nordstrom's Tomato-Basil Soup
Source: original recipe @ Serious Eats
adapted by There's Always Thyme to Cook
Printable Recipe

4 tablespoons olive oil
1 bag shredded carrots, 4 large carrots (peeled) or a bag of baby carrots cut in smaller pieces
1 onion, sliced
1 tablespoon dried basil, crushed
2 28-ounce cans whole peeled Roma tomatoes
1 quart chicken broth
1 cup heavy cream
Salt and pepper to taste

In a large, heavy soup pot, heat the olive oil over medium-high heat. Add the carrots and onion and cook until the vegetables start to soften, about 10 minutes, then add basil and cook until vegetables are completely soft, about 5 or 10 minutes more.

Add tomatoes and broth, bring to a boil, then reduce heat and simmer 30 minutes.

Purée with an immersion blender, regular blender or a food processor until smooth, doing so in batches if necessary. Be careful, soup will be very hot! For a much smoother texture, you can strain the purée and return the soup to the pot. Simmer for another 15 minutes or more.

Stir in cream over low heat, until desired texture is reached and soup is just heated through. Season to taste with salt and pepper, and serve warm.


Joining Suzy from Kitchen Bouquet for another Flashback Friday! Click here to see more Flashbacks.
The recipe for the Roasted Tomato Soup is here

Thursday, February 17, 2011

Macaroni and Cheese!

ok, so I really stink at Mac and Cheese. I admit it, I really do. I did get a few really great sounding recipes by email that I have saved, thank you all so much for sending and helping! and I will get to them, but first I thought I should really try my hand at the simplest and most easiest for me and see what happens.

Last time we needed a saw to cut through the clump of too much cheese, milk, everything else I dumped in that pot. So I went for the Quick and Easy Velveeta recipe. Doesn't get much easier than that. One step away from the powdered mac and cheese in the blue box that I had way more than I care to admit in college. And my kids requested that blue box all the time when they were little. I like the blue box. Miss Picky will still stop at Burger King occasionally to get a cup of that stuff.  they actually sell it at Burger King!  But I wanted to try to make it myself. And no powder. So I used Cheese Product instead. Go ahead and laugh at me. It came out good! Really good.

One box of elbow macaroni cooked according to the package, Velveeta cheese product cut in cubes, I love how it's called Cheese Product, I guess they can't really call it Cheese! And now I am on my way, it came out perfect. The family loved it. It was creamy, and cheesy and good.  I'm ready to try again, another recipe, one of these days. We're a little cheesed out for now.

We had it with a Spiral Ham. While I really don't mind cheese product at all, I drew the line at the brown sugar glaze that came with the ham. It just didn't appeal to me in that plastic packet. Making a glaze takes no time, so I looked online and found a nice mustard-apricot glaze that sounded really good! It was but I screwed that up and forgot to put the glaze on until almost the end. So no crunchy sweet crust. Still moist and really tasty. I'll definitely make the glaze again. The ham was big though, we'll be eating it for years. I bought it for the bone. There's Split Pea Soup in our future.


THIS WAS LAST TIME...
Terrible!


and this was this time...
creamy, cheesy and just the way my kids like it. Now if I can just get it right again. And again!


The ham was good, I need to learn how to cut the slices off the spiral, I made a big mess out of it, but presentation isn't everything. It tasted great! And sandwiches the next day were super good! Now to make that split pea soup!


Velveeta Macaroni and Cheese
Source: Good Morning America recipes
adapted by There's Always Thyme to Cook
Printable Recipe

2 cups elbow macaroni, uncooked  (I used the whole box!)
3/4 lb. (12 oz.) Velveeta cheese product, cut up
1/3 cup milk
freshly ground pepper, to taste

Cook macaroni as directed on package; drain well. Return pasta to the pot.

Add remaining ingredients; mix well. Cook on low heat until the Velveeta is all melted, stirring frequently. Serve.

Maple-Mustard Ham Glaze
adapted by There's Always Thyme to Cook
Printable Recipe

1 (18-pound) whole bone-in, fully cooked, smoked ham, room temperature (I used a much smaller ham)
1/2 cup champagne vinegar
1 cup maple syrup
2/3 cup country-style Dijon mustard
2 tablespoons apricot jam (I used more, about a 1/4 cup)
Pinch of coarse salt
Freshly ground black pepper

Preheat oven to 350 degrees. Line a roasting pan with heavy-duty aluminum foil.

Rinse ham under cool running water. Pat dry and wrap with parchment paper-lined aluminum foil; place in prepared roasting pan. Transfer to oven for 4 1/2 hours.

Meanwhile, in a small saucepan, heat vinegar over medium-high heat until reduced to 2 tablespoons, about 6 minutes. Add maple syrup, mustard, jam, and salt; season with pepper. Cook, whisking, until well combined, about 2 minutes. Set glaze aside.

Remove ham from oven and uncover. When cool enough to handle, cut off rind using a sharp knife. Slice off most of the fat, leaving a 1/4-inch-thick layer. Score fat on top of ham in a pattern of 1- to 2-inch diamonds.

Brush ham evenly with one-third of the glaze and return to oven. After 20 minutes, brush ham again with half the remaining glaze. Cook for 15 minutes and brush with remaining glaze. Continue baking ham until an instant-read thermometer inserted into thickest part of ham reaches 145 to 150 degrees, about 15 minutes more.

Transfer to a cutting board. Let ham cool 30 minutes before carving.

~~~~~~~~~~~~~~~~~~~~~~~~~~~~~~~~~~~~~~~~~~~~~~~~~~~


I'm joining Suzy over at Kitchen Bouquet for another Flashback Friday!

Thursday, February 3, 2011

Secret Ingredient? BSI!

I love Secret Indredients! Miss Picky knows all about them, LOL, although I never really hid anything from her. I know in twenty or thirty years she may come around :) And this secret ingredient can't really be all that secret. At least not the one I used for this party!

Debbi from Debbi Does Dinner Healthy is the host for the Blogger Secret Ingredient from My Bizzy Kitchen and her secret ingredient is HOT SAUCE!  Hard to keep hot sauce a secret! Stop by Debbi's to join in with your favorite hot recipes! Could be new, or one from the past! As long as it includes some kind of hot sauce.

One of our favorites is Sriracha. I first posted the recipe for Hot-and-Sour Cabbage Salad last May. It ought to be called REALLY Hot-and Sour Cabbage Salad because it'll clear your sinuses for sure! But not so hot that you can't taste the flavor of the sauce. I like a hot sauce with heat, but also lots of flavor. This has heat and lots of flavor. The salad is a really nice combination of sweet and hot. A little too hot for Grandma, but the rest of is really enjoy it!


Hot-and-Sour Cabbage Salad
Source: Gourmet, December 2001
Printable Recipe

1 pound Napa cabbage (about 1/2 head), chopped in small pieces, but not too small
1 scallion, thinly sliced
1/4 cup seasoned rice vinegar
1 teaspoon minced peeled fresh ginger
1 teaspoon sugar
1/2 to 3/4 teaspoon dried hot red pepper flakes (to taste) - I used hot chili oil, very little, a few drops!
some thin slices of sweet red bell pepper
some thin slices of fresh jalapeno
Sriracha sauce (to taste!)

Put cabbage, peppers and scallion in a large bowl.

Bring vinegar, ginger, sugar, and red pepper flakes (or chili oil) to a boil in a small saucepan over moderate heat, stirring until sugar is dissolved. Let dressing cool, and then pour dressing over cabbage, tossing to combine.


I'm joining Suzy over at Kitchen Bouquet for another Flashback Friday!
The original post can be found here!


and also joining Debbi, from Debbi Does Dinner...Healthy and Low Calorie, for the Blogger Secret Ingredient Challenge from The Bizzy Kitchen.

Thursday, January 27, 2011

More with Marsala, again!

We had some old friends come by for dinner this past weekend and I didn't want to be stuck in the kitchen and missing good conversation, or some good wine and cheese either! So I wanted something for dinner that would be really easy and really good, that I could make ahead. Chicken Lombardy fit the bill. It's Chicken Marsala, topped with mozzarella and then baked in the oven. You can prepare it way ahead so all you have to do is stick it in the oven to finish it while you enjoy the company. Unless it's company you really don't feel like being with, LOL, and then you can make while they are in another room! Just don't enjoy your company too much or your cheese will go beyond golden. We chatted a little too much. Ask me how I know?

My friend, Cindy5_NY gave me a perfect side for the Lombardy Chicken. Orzo. This one is a great side, it has great flavor to stand on it's own, but when the sauce from the chicken sort of mixes in a bit from the plate, it's a really delicious combination! And if you want to make this one ahead, just prep everything a little before the company shows, and add the milk and heat it up just before you are ready to serve!

Click here for the Chicken Lombardy recipe post

The Chicken picture is from when I made it the last time, and the orzo is from a phone, not a clear shot, I was trying to be inconspicuous. Which I really am not, not one bit, so bringing a camera out to start shooting dinner with company would just give them more to tease me about! So instead I went with the cell camera :)


Garlic Parmesan Orzo
Source: tasteofhome.com (my source: Cindy5_NY)
Printable Recipe

2 cups uncooked orzo pasta
3 teaspoons minced garlic
1/2 cup butter, cubed (I used less)
1/2 cup grated Parmesan cheese (I used a bit more)
1/4 cup milk (I used low-fat)
2 tablespoon minced fresh parsley
1 teaspoon salt
1/4 teaspoon pepper

Cook orzo according to package directions; drain. In a large skillet, sauté garlic in butter until tender. Add the orzo, Parmesan cheese, milk, parsley, salt and pepper. Cook and stir until heated through. Yield: 8 servings.


I'm joining Suzy over at Kitchen Bouquet for another Flashback Friday!

Thursday, December 23, 2010

Kasha Varnishkes

It's gotten pretty cold here. A big plate of good old comfort food sometimes just hits the spot! Sometimes they bring you right back to when you were a kid! This one does it for me. My grandma used to make this with brisket or stuffed cabbage, it's a perfect side to soak up the gravy! Dinner was definitely going to be Stuffed Cabbage, but I wanted to serve something beside mashed potatoes. I usually serve mashed potatoes with cabbage rolls, but when I was looking for a change, I found this recipe at Epicurious. It just reminded me so much of when I was a kid, we'd go to Brooklyn to see my Grandparents and have dinner with the whole family at the table. It was a fun production every week, the drive to Brooklyn, familiar sights along the way, going up in the elevator, by the time we got to their floor, the door would open, and you could smell the cooking!  We'd try to guess what it was! Always felt bad for the neighbors, so much garlic! So much spice. So much heartburn :)

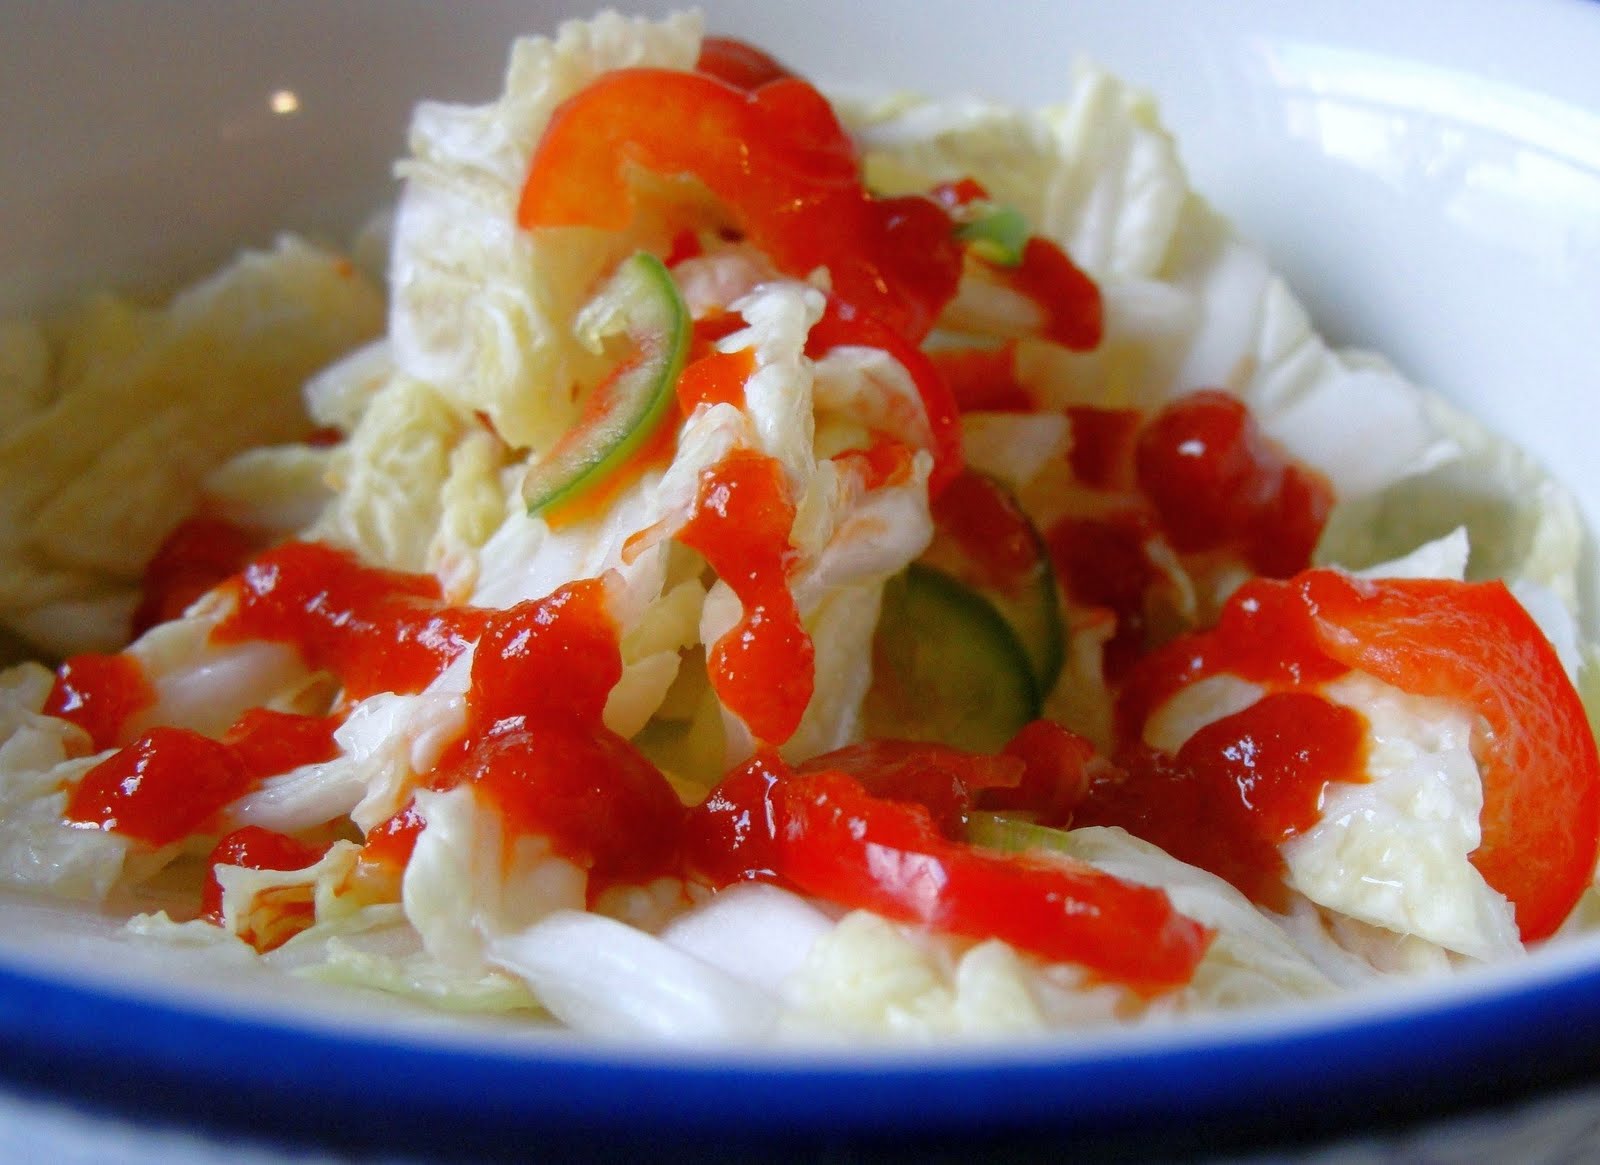
Grandma made Kasha and Bows often! We loved it! My kids never had it before or so they thought. They actually did have it, when they were very small, my grandma had made it for them. Kasha Varnishkes, but they called it Kasha Veronica's! It obviously never left the same impression as it did for me, or they were probably just too little to remember! Miss Picky liked it, the Big Kid loved it. And the Griller is just so good about eating, whatever you put in front of him is fine, except for a stinky cheese! Besides, he's had kasha and bows before! It's something we grew up with!  So I am trying to make some good food memories for my kids! Aside from the ones where they say "hey, remember when Mommy burnt the muffins? Remember when Mom forgot to take the giblet bag out of the chicken before she threw it in the soup pot?"


Kasha Varnishkes
(Kasha and Bowtie Egg Noodles)
Source: Joan Nathan - Jewish Cooking in America
Adapted by There's Always Thyme to Cook
Printable Recipe

2 large onions, diced
1 package cremini mushrooms, chopped (optional)
2 to 3 tablespoons margarine, butter, vegetable oil or chicken fat
1 large egg or egg white, slightly beaten
1 cup medium or coarse kasha
2 cups water or chicken stock
salt and freshly ground pepper to taste
3/4 pound large or small bow tie-shaped noodles
2 tablespoons chopped fresh parsley

Sauté the onions in 2 tablespoons of the margarine or chicken fat in a heavy frying pan with a cover until golden, then add the mushrooms and saute until soft. Remove to a plate.

Beat the egg in a small mixing bowl and stir in the kasha. Mix, making sure all the grains are coated. Put the kasha in the same frying pan, set over a high heat. Flatten, stir, and break up the egg-coated kasha with a fork or wooden spoon for 2 to 4 minutes or until the egg has dried on the kasha and the kernels brown and mostly separate.

Add the water or stock, to the frying pan and bring to a boil. Season with salt and pepper. Add the onions and mushrooms, cover tightly, and cook over low heat, steaming the kasha for 10 or 15 minutes. Remove the cover, stir, and check to see if the kernels are tender and the liquid has been absorbed. If not, cover and continue steaming for 3 to 5 minutes more, until all the liquid has been absorbed.

Meanwhile, bring a large pot of water to a boil. Cook the bow-tie noodles according to the directions on the package. Drain.

When the kasha is ready, combine with the noodles. Adjust the seasoning, sprinkle with the parsley and coriander. If desired, add a bit more margarine or chicken fat. Sprinkle with a little parsley, for garnish.

The dish can be made 1-2 days in advance and reheated, uncovered, in a 350°F oven. If it seems dry, add 1/4 cup chicken stock

Stuffed Cabbage (Holishkes)
Source: Syd M
Printable Recipe

2 heads green cabbage
2 pounds chopped meat
1 egg
2 slices white bread slices, soaked in water and then squeeze out the water
3 15-oz cans tomato sauce
1/4 cup rice (uncooked)
1 cup brown sugar, more or less to taste garlic powder, to taste

Some optional ingredients I found along the way:
Raisins (not for me)
crushed gingersnaps (someone else's mother suggested this!)
a big squeeze fresh lemon juice (1 lemon) or more, to taste!

Boil the cabbage for a few minutes to soften, and remove the outer leaves when cooled. You can also freeze the cabbage heads overnight, but who has room in the freezer for two heads of cabbage? Or you can steam it for a few minutes in the microwave.

In a large, heavy pot or Dutch oven, combine 2 1/2 cans of tomato sauce, 1/2 cup brown sugar, lemon juice and raisins, if you're using them, and some garlic powder. Bring to a boil, then reduce to a simmer. Taste to see if you need more sugar, garlic or lemon juice. Add crushed gingersnaps if you want, I got that idea when I was checking out recipes from a friend's mom. I tried it a few times, but now I don't bother!

Mix meat, eggs, bread, 1/2 can tomato sauce, rice and about 1/3 cup brown sugar. Make a small meatball and place it near the stem end of the leaf, fold stem over the filling, fold in the sides and roll it up firmly. Envelope style. Place the cabbage rolls carefully in the sauce (seam side down) and add chopped pieces of the cabbage and raisins if you want. Simmer at low for 1 1/2 hours or more, I let it simmer for a long while. If you see that there is not enough sauce, add more tomato sauce.

I'm joining Suzy over at Kitchen Bouquet for another Flashback Friday!

Thursday, December 16, 2010

Broccoli-Cheese Soup

My picky one is addicted to Panera Bread's Broccoli Cheese Soup. and their Mac n Cheese! I've given up on duplicating the Mac n Cheese because I am just challenged when it comes to anything other than the blue box kind. Good thing they love that, too, because I just can't get mac n cheese right. The third time was not a charm! And believe me, I've tried. See here, the pic of my Mac n Cement Cheese, so bad!

So Panera and just about any other homemade Mac and Cheese is out for now, but Broccoli soup is another story! Did great with that! Made it once before and it was really good, so when I saw Mary's recipe from One Perfect Bite, I knew I had to try it, too! And I'm glad I did! All I did was add a little nutmeg and some cayenne pepper to suit our tastes! We loved it!


Broccoli and Cheddar Soup
Source: Mary @ One Perfect Bite
adapted by There's Always Thyme to Cook
Printable Recipe

1 pound of fresh broccoli florets
4 tablespoons butter
1/3 cup finely chopped carrot
2/3 cup finely chopped onion
6 cups chicken broth
1/2 cup flour
3 cups whole milk
1/8 teaspoon garlic powder
1/2 teaspoon salt
1/2 teaspoon freshly ground pepper
8 ounces Colby cheese, shredded
4 ounces sharp Cheddar, shredded
(I used Monterey Jack and Cheddar, low fat milk, and added a bit of cayenne pepper and a dash of nutmeg)

Melt butter in a large saucepan set over over medium heat. Add onions and carrots and saute for 5-6 minutes, or until vegetables are tender.

Add 2 cups chicken broth to pan and heat until boiling. Add broccoli and cook, covered, until broccoli is tender, about 5 to 6 minutes. Using a spoon, break broccoli into small pieces. Reduce heat to low. Add remaining 4 cups chicken broth to pot.

Mix flour and milk in a small bowl and whisk until smooth. Add mixture to pot. Add garlic powder, salt, and pepper. Continue cooking over low heat until soup thickens, about 5-6 minutes.

Add cheese, handfuls at a time, and stir constantly over low heat until smooth and creamy - about 10 minutes. If soup becomes too thick, add additional chicken stock. Do not let soup boil. Serve hot.


I'm joining Suzy over at Kitchen Bouquet for another Flashback Friday!


Flashing back to another recipe for broccoli soup, this one I had posted from Martha Stewart, Cream of Broccoli Soup!

Friday, December 10, 2010

Roast Chicken and Latkes!

Hanukkah is over this year, but I couldn't let another day go by without making the traditional potato pancakes! Found a new recipe for chicken, too, that I had been meaning to try! I got so busy with the latkes that I never got a chance to take a picture of the chicken! But it was a delicious recipe. Went nicely with the potato pancakes! Maple Garlic Roasted Chicken. Miss Picky asked for thin chicken cutlets instead of the thicker boneless, skinless! Anything for Miss Picky and it turned out well, we all loved it!

Some folks like sour cream on their latkes. Not us. Applesauce all the way! Alton Brown's Ten-Minute Microwave Applesauce is really easy and comes out so good. With or without the Cognac or Brandy, it's delicious! but I'm a "with" the alcohol and usually use Calvados! It gives it a nice flavor.This time I used all Fuji apples! Pretty foolproof recipe. I didn't even peel this time, instead of the immersion blender, I used the food mill!


They're good for any time, it sounds like a lot more work than they really are, but for some reason, we only make them during the holidays! The worst part? The house stinks like fried oil for a while!  But so worth it for a big batch of potato pancakes!


Potato Latkes
http://theresalwaysthyme.blogspot.com/2009/12/latkes-101.html
Printable Recipe

8 potatoes (I use Russets or Yukon Golds)
2 onions
3 eggs, beaten
3/4 cup matzoh meal (flour can be substituted)
1 teaspoon salt (more or less to taste)
1 teaspoon freshly ground black pepper (more or less to taste)
vegetable oil

Peel potatoes and coarsely grate by hand, along with the onion.  You can also use a food processor (I used the medium shredding disc for a Cuisinart Food Processor for both the potatoes and the onions.) Then put the shredded potatoes and onions into a fine strainer over a bowl and press out whatever excess liquid you can.  Pour the potatoes and onions into a bowl with the beaten eggs, salt and pepper. Mix it all together and then add a handful or two of matzoh meal. Mix to combine. Then put it all back into the strainer and let it drain as you make the latkes.

Heat about 1/2 inch of oil to medium-high heat, about 350°F. Form the mixture into pancakes about the size of your palm or you can spoon 2 tablespoons potato mixture per latke into skillet, spreading and flattening into rounds with a fork. Don't crowd the pan. Cook until the bottoms are browned, about 5 minutes. Turn latkes over and cook about 5 minutes more, until the undersides are golden brown. You can tell it's browning from the edges, don't burn them. Add more oil to skillet as needed. Too high a heat is not good, the oil should not be smoking.

Place finished latkes on paper towels to drain. Keep latkes warm on a wire rack set in a shallow baking pan in 250°F oven. Eat hot with applesauce. Or sour cream. They freeze well, to reheat, do not thaw, place frozen latkes on a rack in a sheet pan and bake at 350°F for about 10-15 minutes.


Ten Minute Microwave Applesauce
http://theresalwaysthyme.blogspot.com/2009/12/mosaic-monday-happy-hanukkah-with.html
Source: Alton Brown, Food Network
Printable Recipe

3 Golden Delicious apples, peeled, cored, and quartered (I use Granny Smith and Braeburn or all Fuji)
3 Fuji apples, peeled, cored, and quartered
1 cup unfiltered apple juice (filtered clear juice works, too)
2 tablespoons cognac or brandy (I used Calvados)
2 tablespoons butter
3 tablespoons honey
1/2 teaspoon ground cinnamon (I used more)

In a sealable microwave-safe container, combine apples with all other ingredients. Close lid, leaving one corner of lid open to allow steam to escape. Microwave on high for 10 minutes.

Using a hand blender or potato masher, blend to desired consistency. Serve hot immediately or chill for later use.

Maple Garlic Roasted Chicken
Source: Food Network, Canada - recipe by Anna Olson
adapted There's Always Thyme to Cook
Printable Recipe

8 boneless, skinless chicken breasts (I used thin sliced)
1 1/2 cups B-Grade pure maple syrup
1 head garlic
1/3 cup + 3 tablespoons malt vinegar
salt and pepper

Place chicken breasts in a shallow dish. Pour 1 cup maple syrup over chicken. Peel head of garlic and crush cloves under the flat-side of a knife and add all but 2 cloves to chicken. Add 1/3 cup malt vinegar and toss chicken to coat. Let marinate from 1 to 6 hours.

Preheat oven to 375 F and grease a roasting pan. Place chicken breasts in roasting pan, shaking off excess syrup, and season. Roast uncovered for about 25 minutes, until an internal temperature of 180 F is reached. Let chicken rest 10 minutes.

To serve, heat remaining 1/2 cup maple syrup, 3 tablespoon malt vinegar and 2 cloves of garlic. Simmer for 3 minutes, then remove garlic and keep warm. Slice chicken breasts into 3 pieces, on an angle and plate. Spoon warm syrup over and serve.

* I used thin cutlets so I poured the marinade in the baking dish so it wouldn't dry out when I baked it! When the chicken was done, I poured most of the juices (marinade) into a saucepan but left a little in the pan to keep the chicken moist and kept it warm in the oven. I boiled down the marinade to make a little bit thicker sauce. I think this would also be great with skinless chicken on the bone! *

I'm joining Suzy over at Kitchen Bouquet for another Flashback Friday!

Back to top